How to Make a Paper Plate Butterfly: A Beautiful Watercolor Craft Guide
Are you looking for a creative and engaging activity for a rainy afternoon? Learning how to make a paper plate butterfly is a fantastic way to blend simple household items with artistic expression. This DIY craft is perfect for kids and adults alike, combining the tactile joy of paper crafting with the fluid beauty of watercolor painting.
In this comprehensive guide, we will walk you through 14 detailed steps to create a stunning, unique butterfly that looks like a professional work of art. By following these steps, you’ll master the art of transforming a humble paper plate into a vibrant, fluttering masterpiece.
Why Choose Watercolor Paper Plate Crafts?
Paper plate crafts are a staple of childhood creativity, but adding a watercolor twist elevates the project. Watercolors allow for a beautiful blend of colors, making each butterfly wing truly unique. Unlike markers or crayons, watercolors provide a soft, ethereal texture that perfectly captures the delicate nature of a butterfly’s wings.
Materials You Will Need:
- Paper plates (white, non-coated work best for watercolors)
- Watercolor paints (Yellow and Purple for our theme)
- Soft-bristled paintbrushes
- Bright red scissors
- Wooden craft sticks
- Purple pom poms
- Orange pipe cleaners
- Googly eyes
- Hot glue gun (with adult supervision)
- A cup of water and paper towels
Step-by-Step Instructions to Create Your Butterfly
1. Prepare Your Patterned Plate
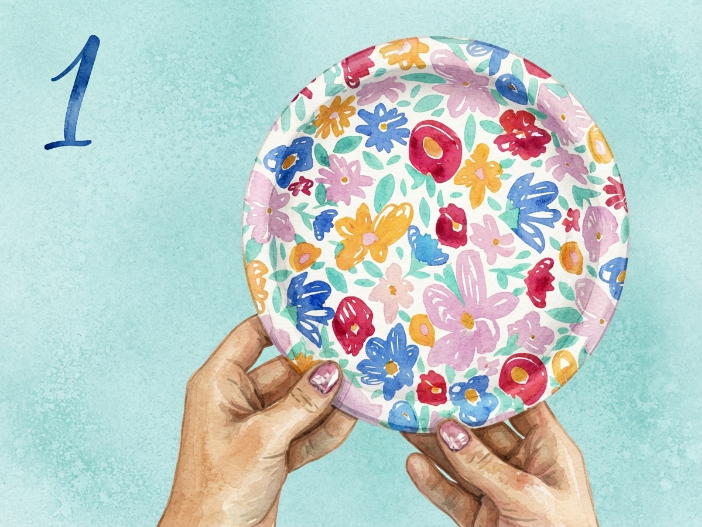
Start with your main paper plate. Use your watercolors to paint vibrant yellow and purple floral designs across the surface. Let the colors bleed together slightly for a professional watercolor effect. Once dry, hold the plate up to ensure the pattern is even and saturated.
2. Precision Cutting
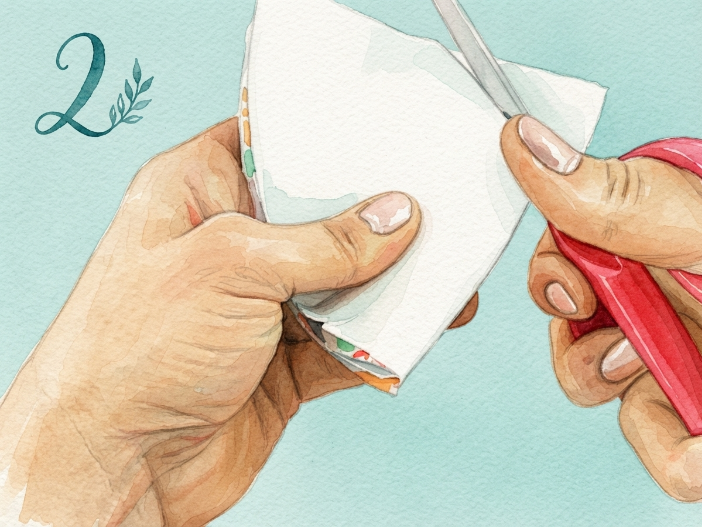
Fold a piece of white paper in half. Using your bright red scissors, carefully cut along the fold to create symmetrical shapes. This exercise is great for developing fine motor skills and ensures your butterfly has perfectly balanced components.
3. Creating the Circular Base
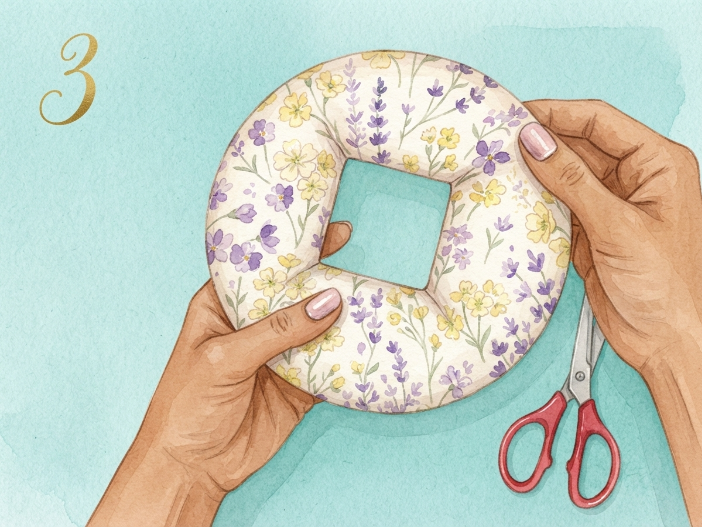
Focus on the circular craft piece that will serve as a central element. Ensure your yellow and purple floral patterns are prominently displayed. Keep your red scissors nearby for any quick trims needed to maintain a smooth, circular edge.
4. Organize Your Floral Pieces
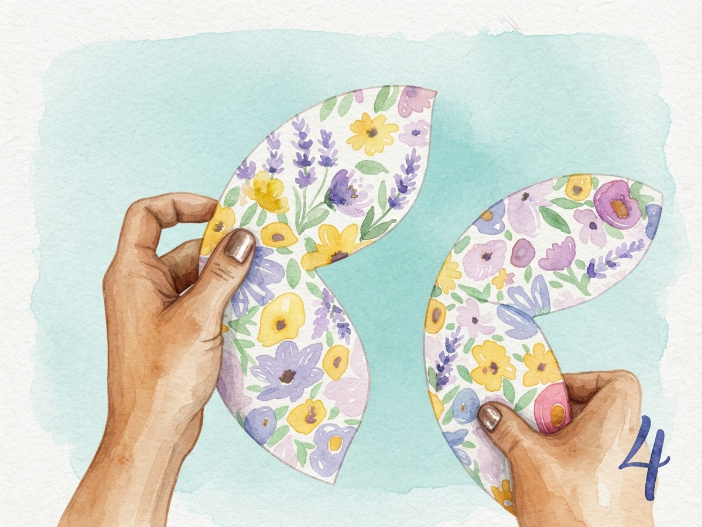
Hold your curved floral paper pieces together. At this stage, you should see the magenta and lime green highlights (if you’ve added them) coming to life. Organization is key to a smooth assembly process.
5. Secure with Glue
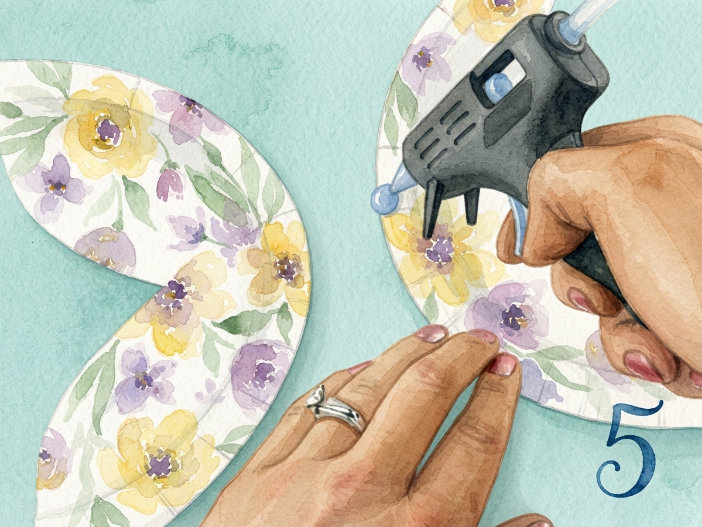
Using your glue gun, apply a small amount of adhesive to the edge of your floral plate. Be careful to apply just enough to hold the pieces without creating bulk. This step begins to bring the structural integrity to your craft.
6. The Art of Folding
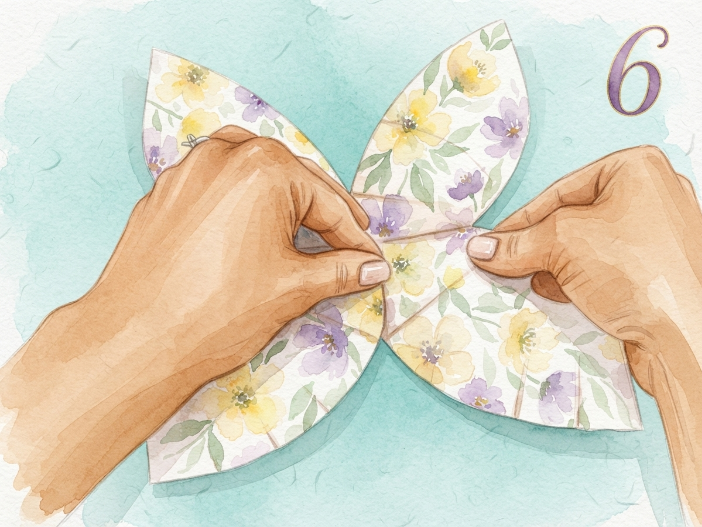
Delicately fold your floral patterned paper. Creasing the paper correctly adds dimension and a 3D effect to your butterfly wings. The watercolor texture will catch the light beautifully on these new folds.
7. Prepare the Body Support
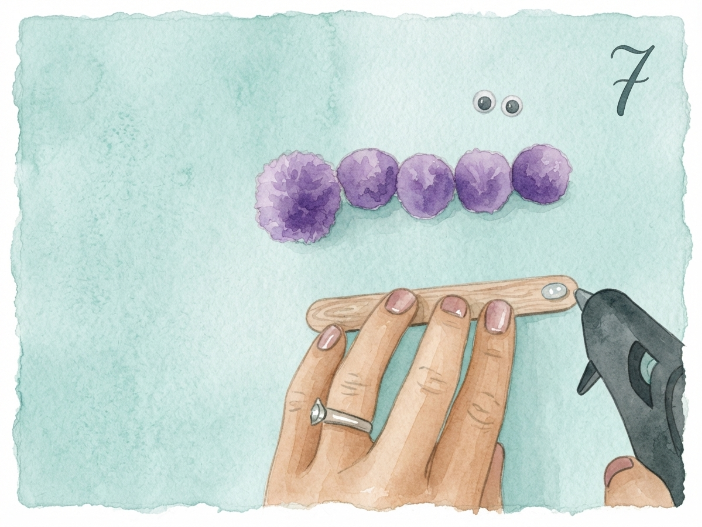
Take your wooden craft stick and apply a drop of glue at the top. Position your purple watercolor pom poms nearby. The craft stick serves as the sturdy ‘spine’ of your butterfly.
8. Assemble the Body
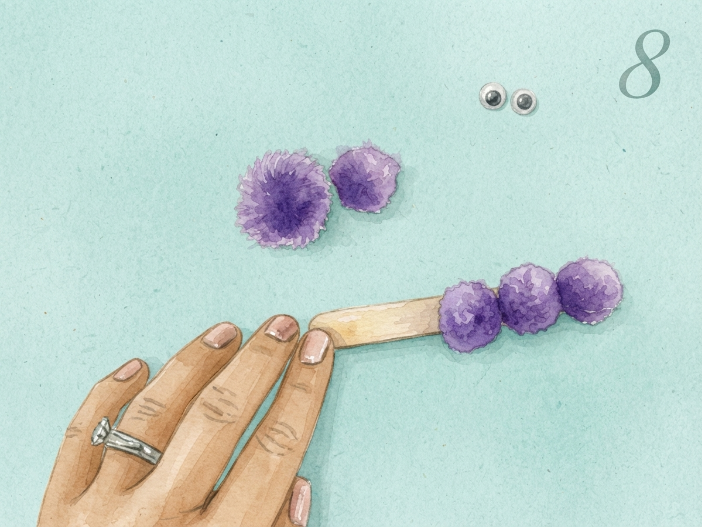
Reach for your purple pom poms and begin arranging them along the craft stick. This creates a soft, textured body that contrasts beautifully with the paper wings.
9. Create the Caterpillar Spine
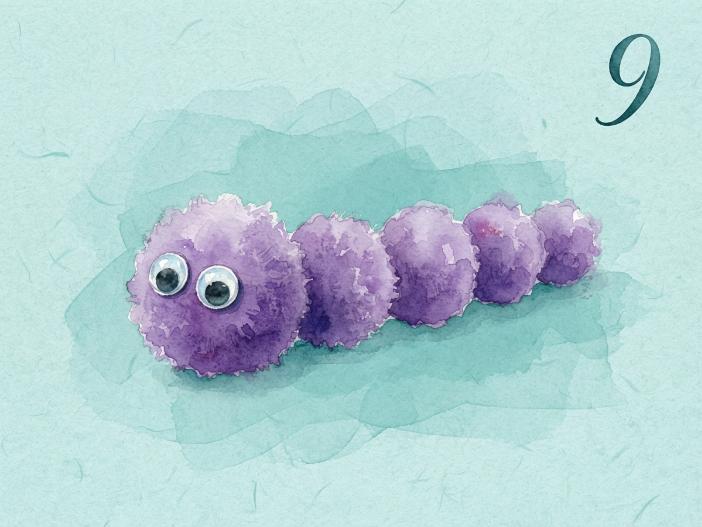
Continue adding pom poms until you have a full caterpillar-like body. Ensure the googly eyes are ready to be attached to the top pom pom, giving your butterfly its personality.
10. Add the Antennae
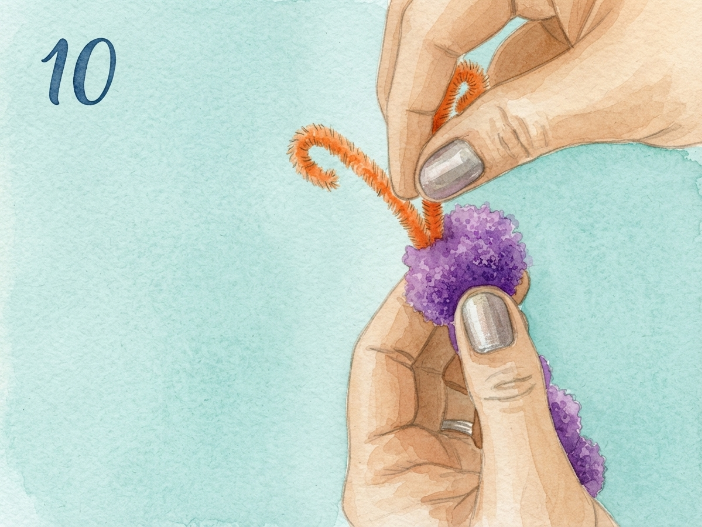
Take your orange pipe cleaners and twist them into small antennae shapes. Carefully attach them to the top purple pom pom. The orange provides a bold pop of color against the purple and teal background.
11. Finalizing the Body
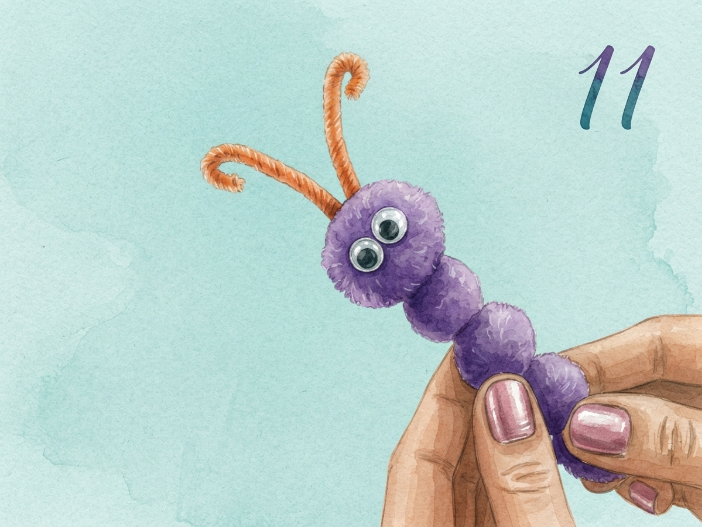
Hold up the completed pom pom body. Check that all pom poms and antennae are securely attached. This is the heart of your craft project!
12. Attaching the Wings
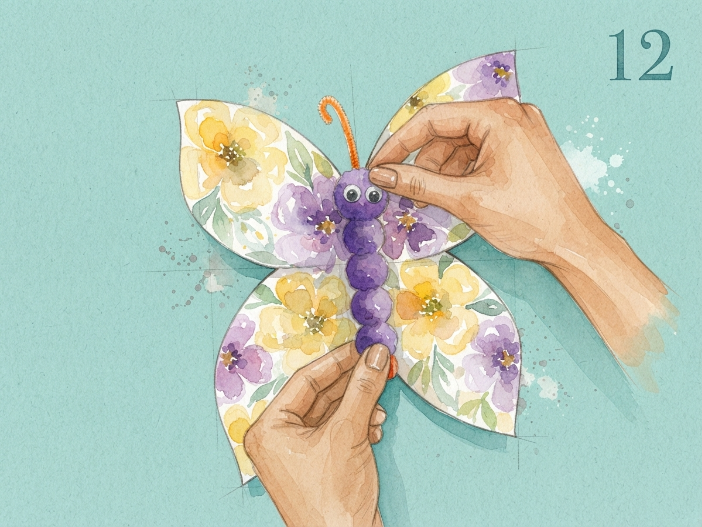
This is the most exciting step! Carefully glue your large watercolor floral wings to the back of the craft stick. Position them so the yellow and purple patterns are fully visible from the front.
13. Fine-Tuning the Appearance
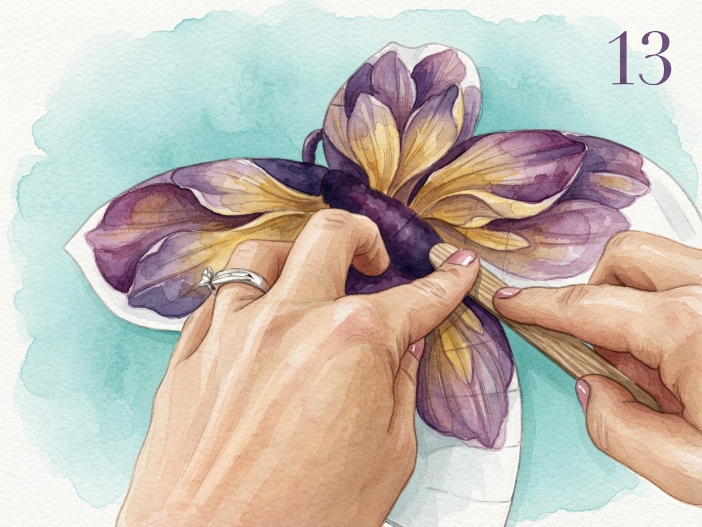
Adjust the wings to your liking. You can bend them slightly forward to give the impression that the butterfly is in mid-flight. Ensure the wooden stick is centered for perfect balance.
14. Your Finished Masterpiece
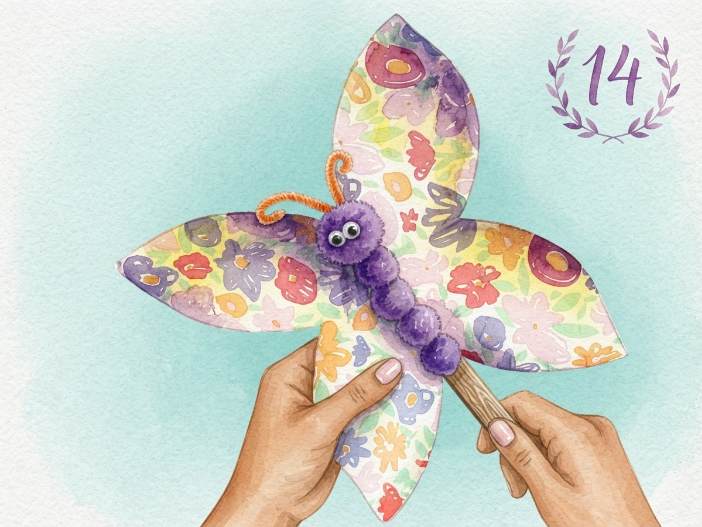
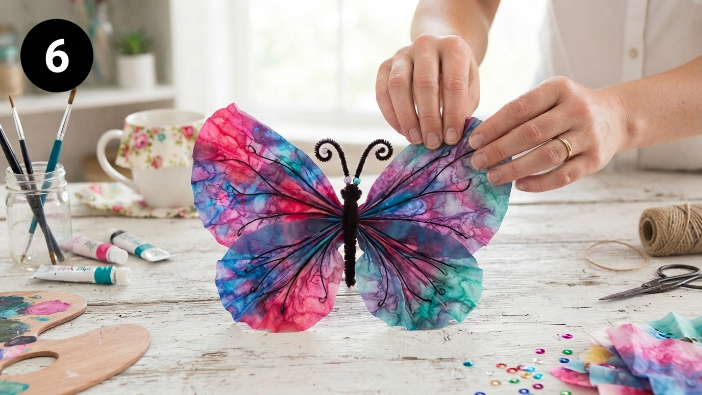
Hold up your finished paper plate butterfly! You now have a beautiful, professional-looking watercolor craft that is ready to be displayed on a wall or used as a playful puppet.
Looking for more butterfly crafts and activities? Check out our Butterfly Activities for Preschool article. Then download these fun butterfly coloring pages for even more creative fun!
Also consult the original video of how to make this activity.
Happy crafting!