10 Fun Butterfly Activities for Preschool: Easy Crafts and Learning Ideas
Butterflies make an excellent preschool theme because they invite children to look closely, ask questions and create with their hands. Their colorful wings inspire art, while the butterfly life cycle introduces a first glimpse of transformation in nature. Even a simple paper butterfly can become a conversation about colors, patterns, counting, symmetry and caring for living things.
This collection of butterfly activities for preschool includes ten easy crafts and learning invitations for children around ages three to five. The projects use familiar supplies such as coffee filters, paper plates, pasta, paint, recycled cardboard and washable markers. Some activities are ideal for a classroom group, while others are better for a quiet afternoon at home.
The goal is not to make every butterfly look perfect. Preschool art is about experimenting, making choices and developing confidence. Expect uneven wings, surprising color combinations and plenty of proud smiles. Those little details are part of what makes each child’s creation special.
Safety note: An adult should supervise scissors, glue, string, small pasta pieces, googly eyes and any outdoor feeder. Use non-toxic, washable supplies, and keep small parts away from children who still put objects in their mouths.
Why butterfly activities are wonderful for preschoolers
Butterfly crafts are more than seasonal decorations. When children fold paper, squeeze a clothespin, place tiny stickers or twist a pipe cleaner, they are strengthening the small hand muscles used later for drawing and writing. When they compare two wings, sort life-cycle stages or count dots, they are practicing early math and science in a natural way.
The National Association for the Education of Young Children emphasizes the importance of developmentally appropriate, hands-on learning and play for young children. These butterfly ideas follow that spirit: children can explore the process, while adults provide just enough support to keep the activity safe and enjoyable.
| Skill area | What children practice |
| Fine motor development | Pinching, scrunching, cutting, gluing and placing small pieces |
| Early science | Observation, life cycles, habitats and transformation |
| Early math | Counting, matching, patterns and symmetry |
| Language | Sequencing words such as first, next, then and finally |
| Creativity | Choosing colors, making patterns and expressing ideas |
| Social-emotional learning | Patience, pride, cooperation and caring for nature |
Materials to gather
You do not need every item for every craft. Set out a small selection and let children choose whenever possible.
•White paper, cardstock and paper plates
•White coffee filters and colorful tissue paper
•Washable markers, crayons and non-toxic paint
•Child-safe scissors and glue sticks
•Wooden clothespins and craft sticks
•Pipe cleaners and string
•Googly eyes, stickers and dot markers
•Rice, spiral pasta, shell pasta and bow-tie pasta
•Recycled cardboard tubes
•A plastic lid or shallow plate for the outdoor feeder
1. Coffee filter butterfly craft
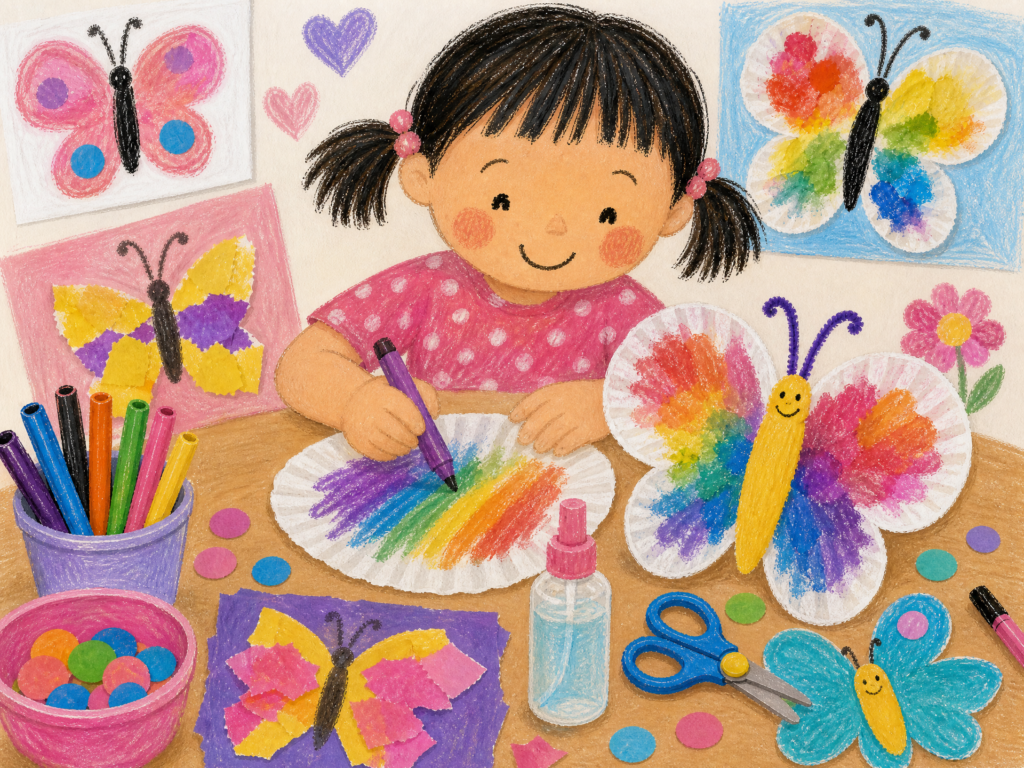
The coffee filter butterfly is one of the easiest butterfly crafts for preschoolers because the water does much of the magic. Children color the filter, watch the pigments spread and then scrunch the paper into soft wings.
Materials
You will need one white coffee filter per child, washable markers, a tray or plate, a small spray bottle filled with water and one pipe cleaner.
Step-by-step instructions
1.Flatten the coffee filter on a tray. If it curls, press it gently with your hands.
2.Invite your child to draw stripes, dots, blocks or a rainbow using washable markers. Leave some white spaces so the colors can move.
3.Lightly mist the filter with water. Do not soak it; a few sprays are enough.
4.Watch the colors blend. Ask what happens when two colors touch.
5.Let the filter dry completely, usually for about 20 to 30 minutes.
6.Scrunch the dry filter at the center to create two wings.
7.Wrap a pipe cleaner around the center and twist it into a body.
8.Curl the two ends into antennae, then gently open the wings.
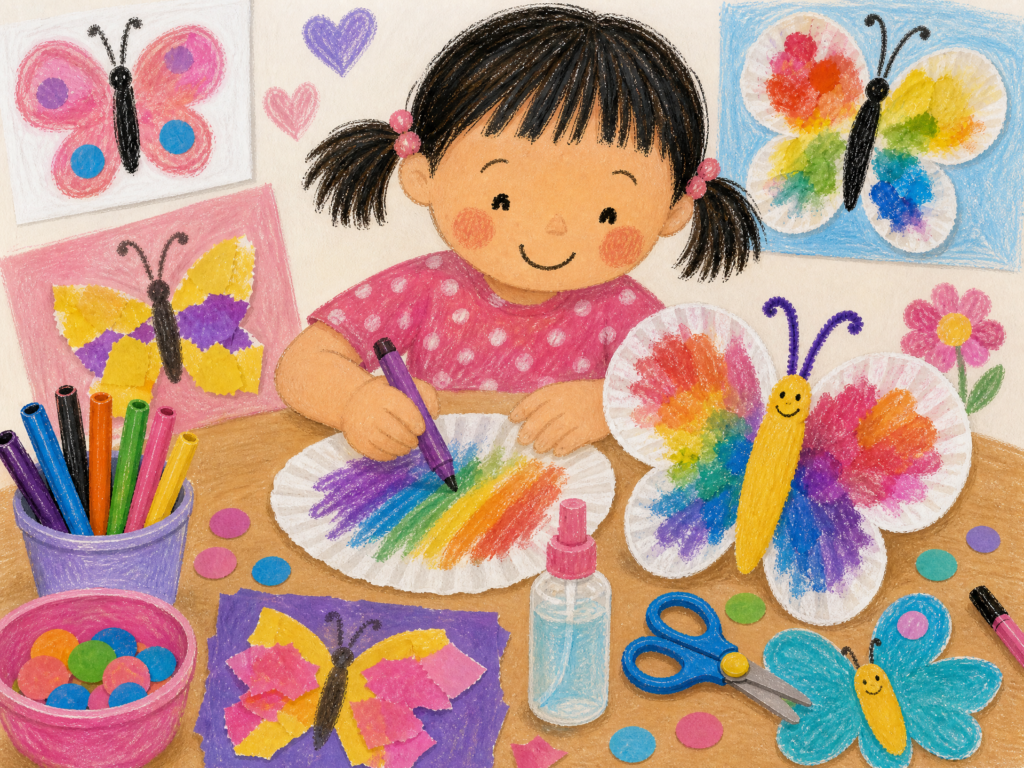
Learning idea: Use this craft to introduce color mixing and the words absorb, spread, blend, wet and dry. Children can also compare a lightly sprayed filter with a heavily sprayed one.
Consult this article for more details on how to make this Coffee filter butterfly craft.
2. Paper plate butterfly
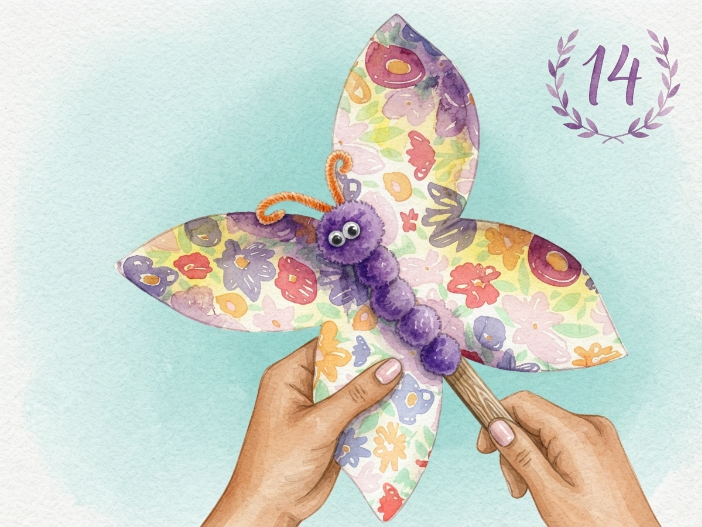
A paper plate gives children a large surface for painting and decorating. This is a good choice for a small preschool group because the materials are inexpensive and the finished butterflies are sturdy enough for dramatic play.
Materials
Gather a paper plate, paint or crayons, child-safe scissors, a craft stick, glue, googly eyes and a pipe cleaner.
Instructions
1.Let your child paint or color the back of the plate. Allow it to dry before cutting.
2.Cut the plate in half. An adult can round the corners if needed.
3.Use the two halves as wings. Encourage your child to add matching or deliberately different patterns.
4.Glue the wings near the top of the craft stick, leaving the stick visible as the body.
5.Add googly eyes to the top of the stick and draw a smile.
6.Twist a pipe cleaner behind the body to make antennae.
Talk about how a butterfly has two wings, one on each side of its body. You can introduce the word symmetry without requiring children to make the wings identical.
Consult this article for more details on how to make this paper plate butterfly craft.
3. Recycled cardboard-roll butterfly
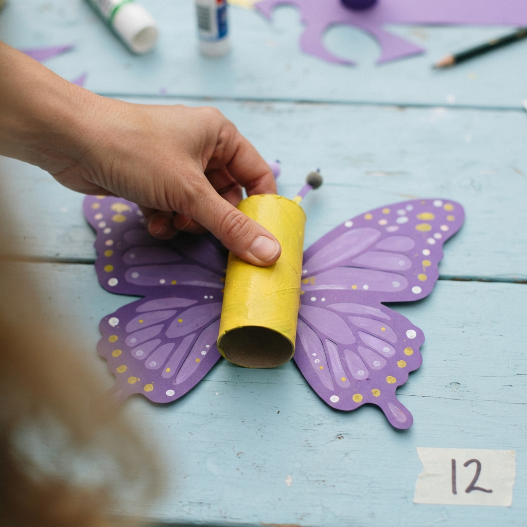
This recycled butterfly turns an empty cardboard tube into a three-dimensional body. It is a simple way to talk about reusing materials while children practice shapes and sequencing.
Materials
Use an empty cardboard roll, colored paper, markers or paint, glue, googly eyes and a pipe cleaner. Cut two large ovals and two smaller ovals from paper before the activity, or let older preschoolers try with help.
Instructions
1.Cover the cardboard roll with colored paper or paint it. Let it dry.
2.Arrange the large and small paper ovals into two wings on each side.
3.Glue the wings to the upper and lower sides of the roll.
4.Decorate the wings with dots, short lines, stickers or fingerprints.
5.Add eyes near the top and draw a smile.
6.Make a small hole in the top with adult help, then thread a pipe cleaner through it for antennae.
Eco-extension: Ask children what other objects can be reused for art. A clean cereal box, paper bag or tissue box can become part of a butterfly habitat mural.
Please Find More detailled Step Here!
4. Handprint butterfly keepsake
A handprint butterfly creates a sweet keepsake while giving children a memorable sensory-art experience. It works especially well for a spring classroom display or a Mother’s Day project.
Materials
Prepare cardstock, washable paint, a paintbrush, glue, a marker and optional googly eyes.
Instructions
1.Paint one or both of the child’s hands with washable paint.
2.Press two handprints onto cardstock with the fingers pointing outward and the palms close together.
3.Let the paint dry completely.
4.Draw or glue a butterfly body between the two handprints.
5.Add antennae, eyes, the child’s name and the date.
6.Invite the child to describe the colors and textures they notice.
Do not worry if the two handprints do not match. That is part of the charm. The activity is about the experience and the memory, not a perfect final picture.
5. Clothespin butterfly
The clothespin butterfly combines art with a useful fine-motor challenge. Children squeeze the clothespin to open it, then place folded paper inside to create wings that flutter.
Materials
You will need a wooden clothespin, a coffee filter or tissue paper, markers, glue, googly eyes and a short pipe cleaner.
Instructions
1.Decorate the clothespin with markers. The pinching end becomes the butterfly’s head.
2.Glue on googly eyes or draw eyes with a marker.
3.Fold a coffee filter or tissue-paper square back and forth like an accordion.
4.Pinch the folded paper in the middle and place it inside the clothespin.
5.Fan out the wings.
6.Twist a short pipe cleaner around the top for antennae.
7.Squeeze the clothespin and watch the wings move.
Fine-motor extension: Place a small basket of clothespins beside the craft table. Children can clip them around a cardboard circle or match them to color cards.
6. Butterfly symmetry painting
Symmetry painting is one of the most exciting butterfly activities for preschool because children get an instant surprise when they open the paper. It introduces a mathematical idea through painting rather than a worksheet.
Materials
Use white paper, washable paint, cotton swabs or small spoons and a marker. An adult can prepare a butterfly template by folding paper in half and cutting a simple butterfly shape.
Instructions
1.Fold a sheet of paper in half.
2.Draw half a butterfly along the fold and cut it out, or use a prepared template.
3.Open the paper to reveal the full butterfly shape.
4.Add small dabs of paint to one side only.
5.Fold the paper closed and press gently with flat hands.
6.Open it slowly to reveal the matching paint pattern.
7.Let it dry, then draw a body and antennae.
Ask children which parts match and which details are different. Use phrases such as “same on both sides,” “left wing,” “right wing” and “middle.”
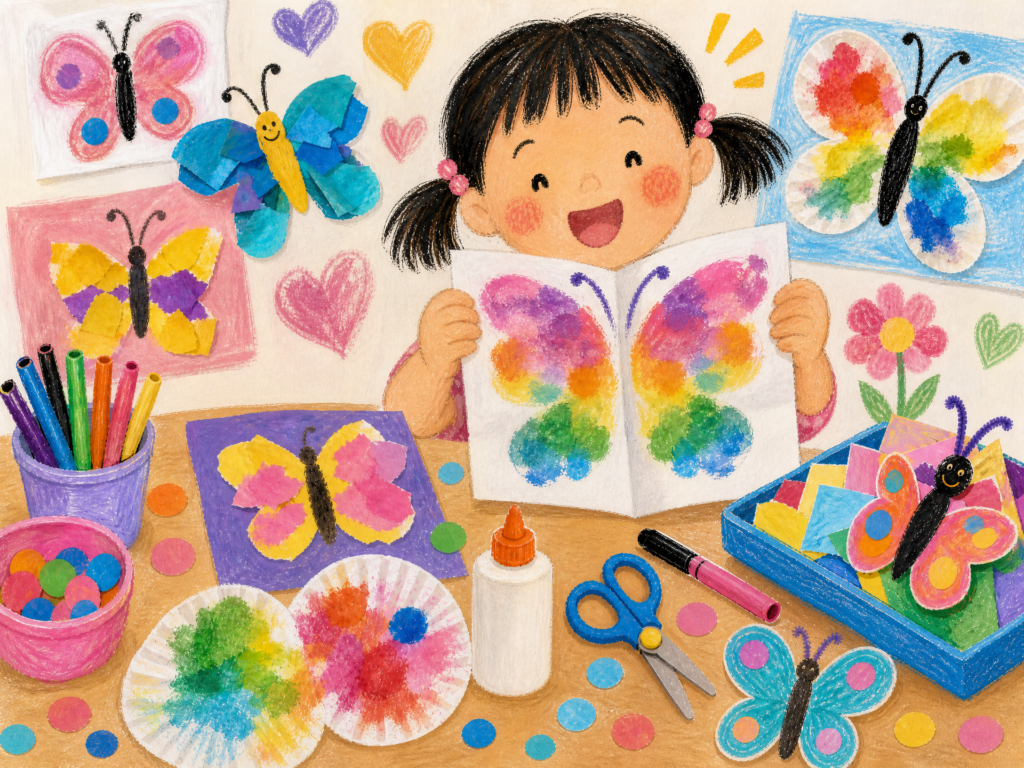
7. Tissue-paper butterfly suncatcher
This project looks beautiful on a sunny window and gives children a gentle introduction to light and transparency. Prepare the black butterfly frame in advance for younger preschoolers.
Materials
Gather black construction paper, colorful tissue-paper squares, glue or clear contact paper, scissors and a butterfly template.
Instructions
1.Cut a large butterfly from black paper.
2.Cut open sections inside the wings to create window spaces. Adults should do this step for younger children.
3.Place clear contact paper sticky-side up, or apply glue around the openings.
4.Let children overlap tissue-paper squares across each opening.
5.Cover all the spaces and trim any excess paper.
6.Tape the butterfly to a sunny window.
7.Observe how the colors look different when light shines through them.
Language prompt: Ask, “What changes when the sun shines through the paper?” Accept all observations rather than looking for one correct answer.
8. Pasta butterfly life-cycle craft
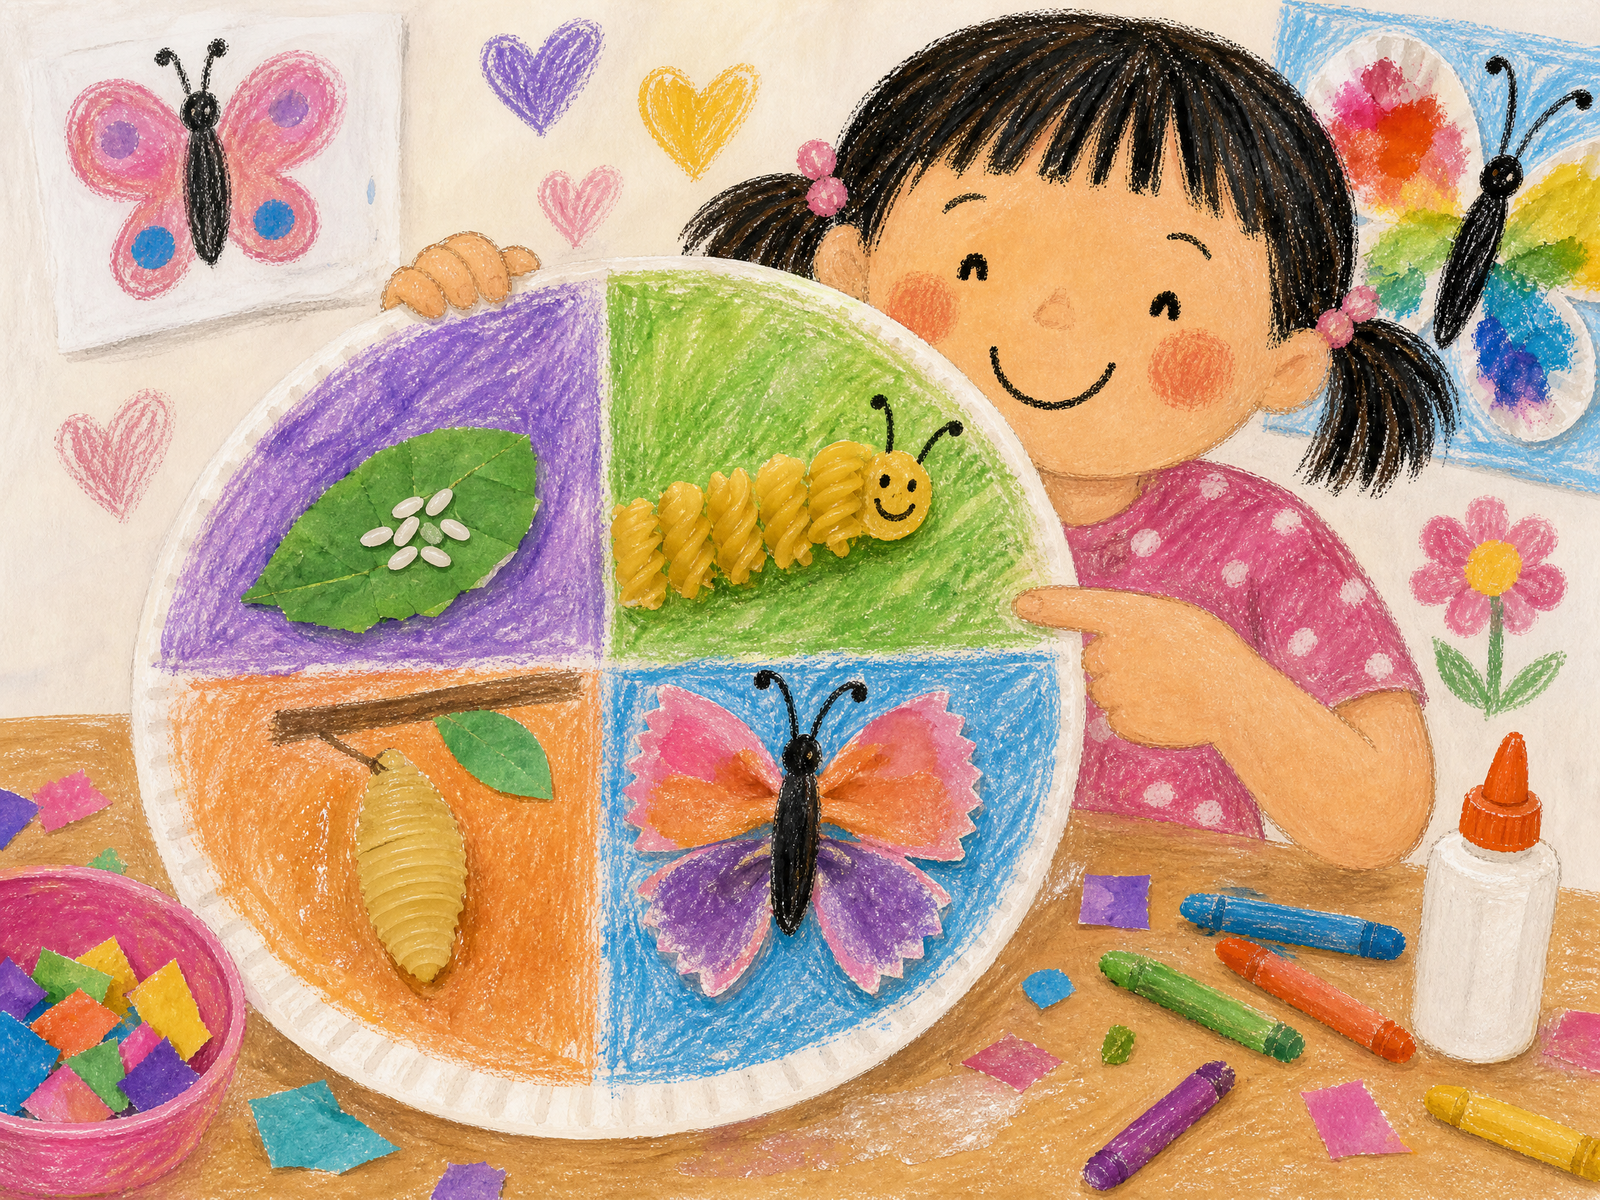
This pasta craft makes the butterfly life cycle concrete and tactile. Children can touch, arrange and talk through the sequence from egg to caterpillar, chrysalis and adult butterfly. The Smithsonian’s National Museum of Natural History provides a helpful overview of butterfly and moth development for adults preparing a science conversation.
Materials
Prepare a paper plate, marker, rice, spiral pasta, shell pasta, bow-tie pasta, glue and green paper leaves.
Instructions
1.Divide the paper plate into four sections.
2.Draw a simple picture in each section or write the stages for adults to read aloud: egg, caterpillar, chrysalis and butterfly.
3.Glue a few grains of rice onto a paper leaf for the egg stage.
4.Glue a piece of spiral pasta into the next section to represent the caterpillar.
5.Use shell pasta or a rolled piece of green paper for the chrysalis.
6.Add a bow-tie pasta butterfly to the final section and decorate its wings.
7.Point to each stage and retell the sequence together.
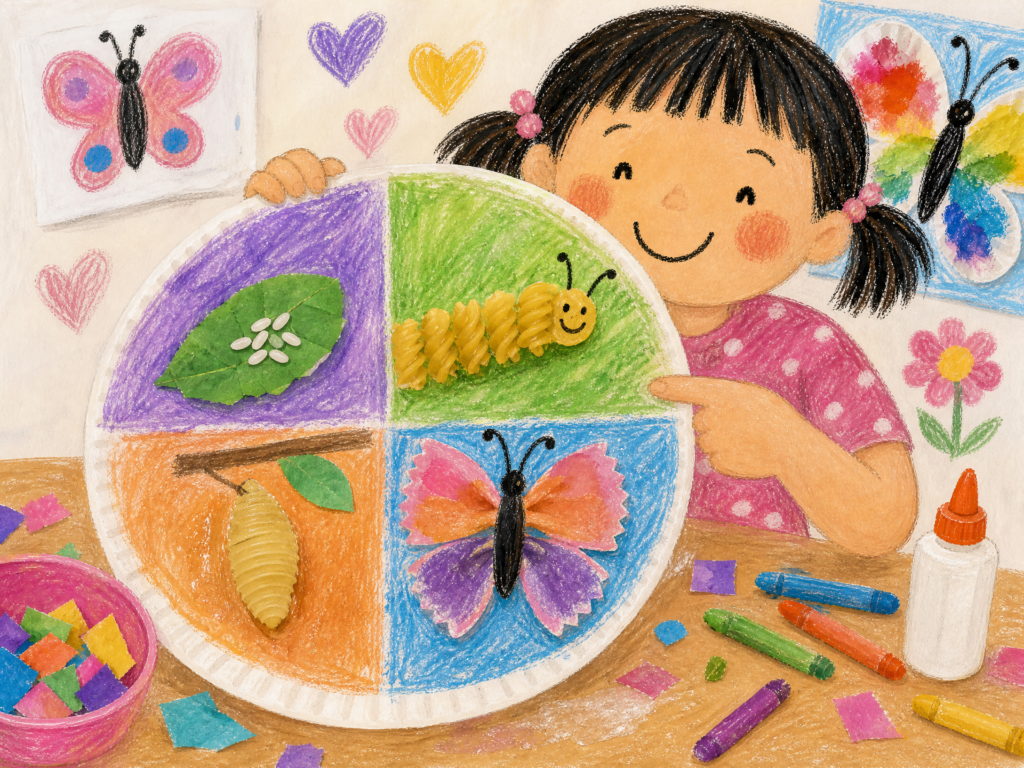
Avoid saying that a caterpillar simply “goes to sleep.” Instead, explain that it changes inside a protective chrysalis. Preschoolers do not need every scientific detail, but accurate language helps build a strong foundation.
9. Butterfly counting game
Turn paper butterflies into a playful math game. This activity can be adjusted for children who are learning to count to five or children who are ready to work with numbers one through ten.
Materials
Use cardstock, scissors, dot stickers or dot markers, clothespins and a permanent marker. An adult should write the numbers on the butterflies and clothespins.
Instructions
1.Cut five to ten simple butterfly shapes.
2.Let children decorate them.
3.Write one number on each butterfly body.
4.Ask children to add the same number of dots to the wings.
5.Write matching numbers on clothespins.
6.Have children clip the correct clothespin to each butterfly.
7.Line the butterflies up from one to ten.
For younger children, use only numbers one through five. For a challenge, ask children to compare two butterflies and decide which has more dots.
10. DIY butterfly feeder and observation journal
A simple fruit feeder can turn an art activity into an outdoor observation experience. Butterflies are attracted to different food sources depending on the species and season, so the best goal is not to guarantee a visit but to create an opportunity to watch patiently.
Materials
Use a clean plastic lid or shallow plate, string, a hole punch, and small pieces of overripe fruit such as orange, banana or watermelon. An adult should prepare all holes and knots.
Instructions
1.Punch four evenly spaced holes around the plate.
2.Tie a length of string through each hole.
3.Knot the strings together above the plate.
4.Hang the feeder in a sunny garden area, away from walkways.
5.Add a small amount of fruit.
6.Observe from a respectful distance.
7.Invite children to draw what they notice in a butterfly journal.
8.Remove the fruit and clean the feeder regularly.
Wash hands after handling fruit and outdoor materials. Children should never touch a butterfly or other wild insect. Observation is enough; the goal is to practice patience and respect for living things.
Tips for a successful preschool butterfly activity session
Prepare the tricky parts first
Pre-cut wing shapes, make templates and place paint in small containers before children arrive. This gives children more time to decorate and explore instead of waiting for adults to prepare materials.
Protect the process, not the outcome
Use trays, washable table covers and smocks. Let children choose their own colors and patterns. If a butterfly has one enormous wing and one tiny wing, it is still a wonderful child-made butterfly.
Keep instructions short
Preschoolers respond well to one direction at a time. Demonstrate the first step, let children try it, then introduce the next step. Use sequencing words such as first, next, then and finally.
Display the finished work at child height
A small gallery at children’s eye level gives them a chance to revisit their work, describe it and feel proud. Add a child’s dictated sentence beneath the artwork for a meaningful literacy connection.
Connect crafts to books and movement
Read a picture book about a caterpillar, act out the four life-cycle stages or invite children to move like a butterfly. For additional science information, adults can consult educational resources from museums and extension programs.
Frequently asked questions
What age are these butterfly activities for?
These ideas are designed mainly for children ages three to five. Younger toddlers can participate when an adult pre-cuts materials, removes small pieces and provides close supervision.
Which butterfly craft is best for a large preschool class?
The coffee filter butterfly, paper plate butterfly and symmetry painting are good group choices. Set up separate trays, demonstrate one step at a time and allow the projects to dry between stages.
How can I teach the butterfly life cycle to preschoolers?
Use the pasta life-cycle craft, movement and repeated vocabulary: egg, caterpillar, chrysalis and butterfly. Keep the explanation simple and accurate, then invite children to retell the sequence in their own words.
Are these butterfly crafts safe for toddlers?
They can be adapted, but adults should remove small pieces such as googly eyes, rice, pasta and stickers for children who still mouth objects. Use child-safe scissors only with direct supervision, and choose washable, non-toxic supplies.
How do I encourage creativity without taking over?
Offer a few materials, demonstrate the basic technique and let children make the choices. Avoid correcting their colors or patterns. Ask open questions such as “Tell me about your butterfly” rather than “What color should the wings be?”
Final thoughts
These butterfly activities for preschool show how much learning can grow from a few simple supplies. A coffee filter becomes a color experiment. A clothespin becomes a fine-motor game. A paper plate becomes a life-cycle model. Most importantly, children get time to make, notice, talk and feel proud of what they created.
Choose one project for a calm afternoon or set up several stations for a complete butterfly-themed week. At Oh Simply Mom, the best activities are the ones that are simple enough to begin quickly and rich enough to invite children back for another look.
Save this guide for spring, classroom science, rainy-day crafting or your next nature-themed play session.